
HelloWorld.py
Your First Program
Programs on PyCubed are simply plain-text files that are saved in the root directory of the board. Changing the program involves merely editing the text file and clicking save! The syntax is exactly like Python3 (more on this later).
Every time it's powered, PyCubed will automatically run the file main.py if it exists on the drive.
In the previous section,  Connect & Verify, we learned PyCubed ships with a
 main.py file that cycles the RGB LED through a rainbow of colors. Now, we'll see how to create our own program on PyCubed and how to execute it rather than main.py.
Coding and using PyCubed is exactly like using other CircuitPython boards. Learn, troubleshoot, and get inspired by seeking out
CircuitPython projects on the web.
Example 1: Hello World
Let's start off by creating a PyCubed program that prints "Hello World" to the serial port once, then once per second it will print the time (in seconds) it's been powered.
- Plug your board into your computer and open Mu
- Paste the following into the coding window within Mu
import time
import board

# print a string only once
print('Hello World!')

# ------- MAIN LOOP -------
while True:
	# print a string followed by the time in seconds since boot
	print('Time on: ',time.monotonic())
	time.sleep(1) # sleep 1 second
- Click the "Save" button in Mu, navigate to the PYCUBED drive (if it isn't there already), and name the file something like
HelloWorld.py. After saving the file, my Mu looks like this: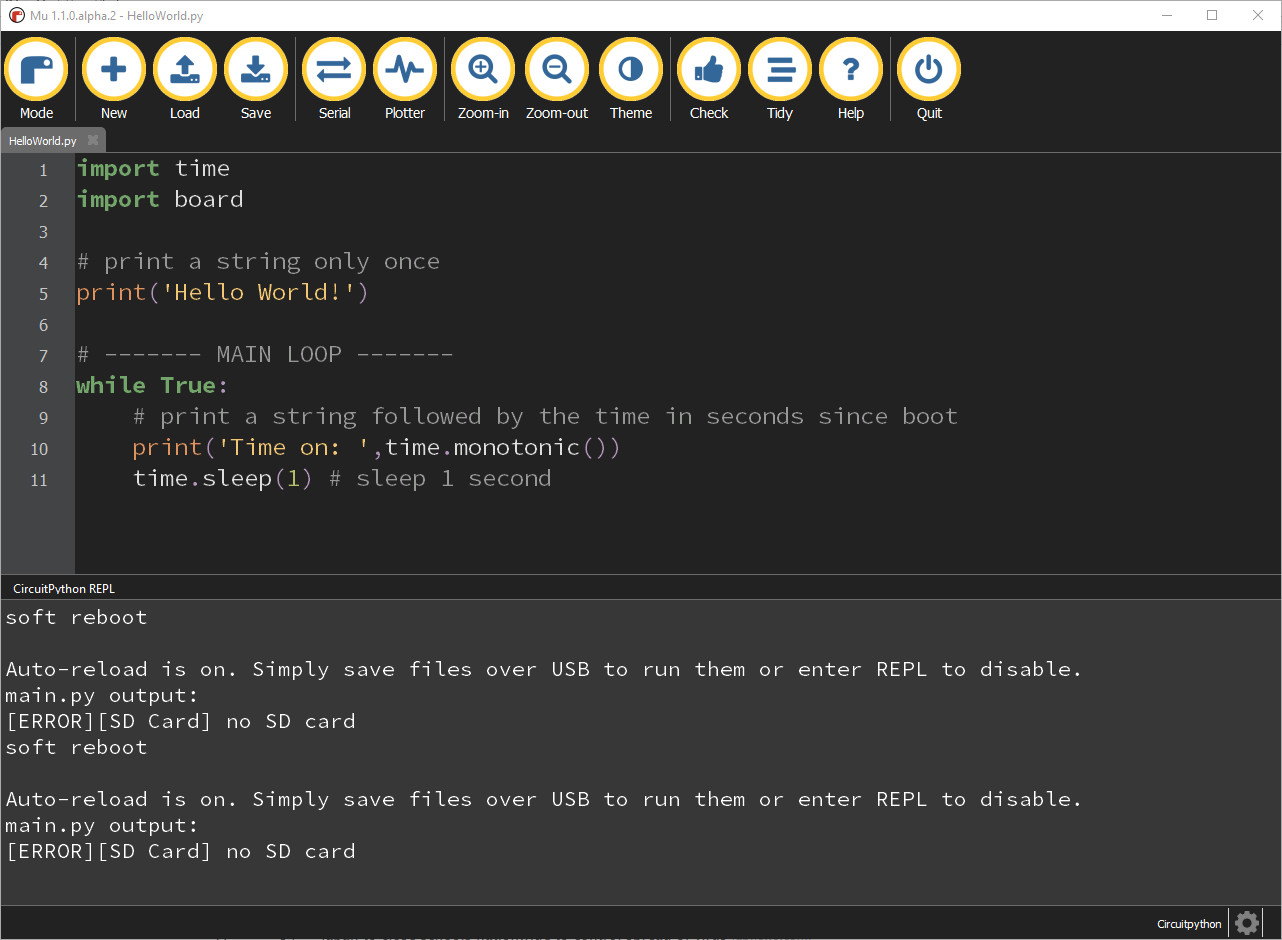
Notice that once the
HelloWorld.pyfile was saved, PyCubed will restart, and will always begin by running the defaultmain.pyfile. We could have editedmain.py, but creating another file allows us to quickly iterate through our coding approach.
- Click inside the REPL window and press
Ctrl+Cto HALT the current program (main.py).💡Keep in mind:
Depending on the code that's running, you may need to press `Ctrl+C` multiple times in order for Mu to catch the keyboard interrupt)
- Press any key (like
ENTER) to enter the REPL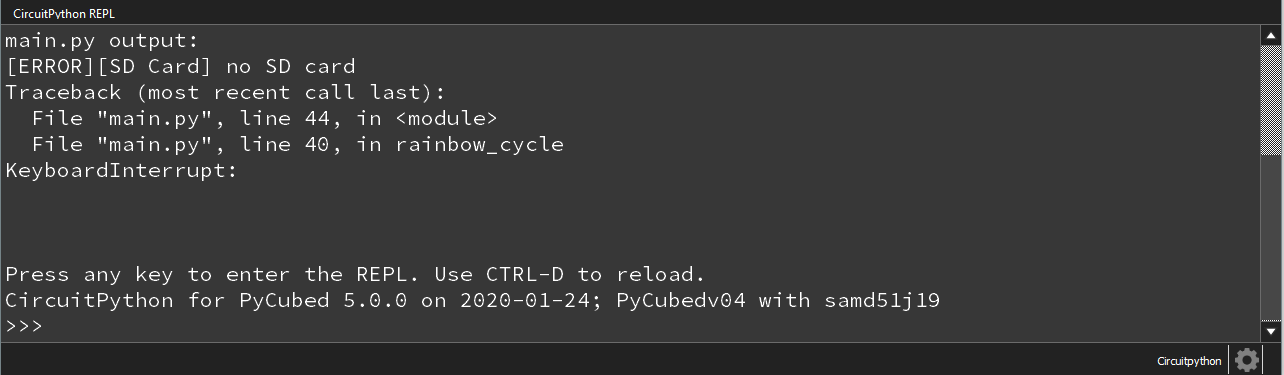
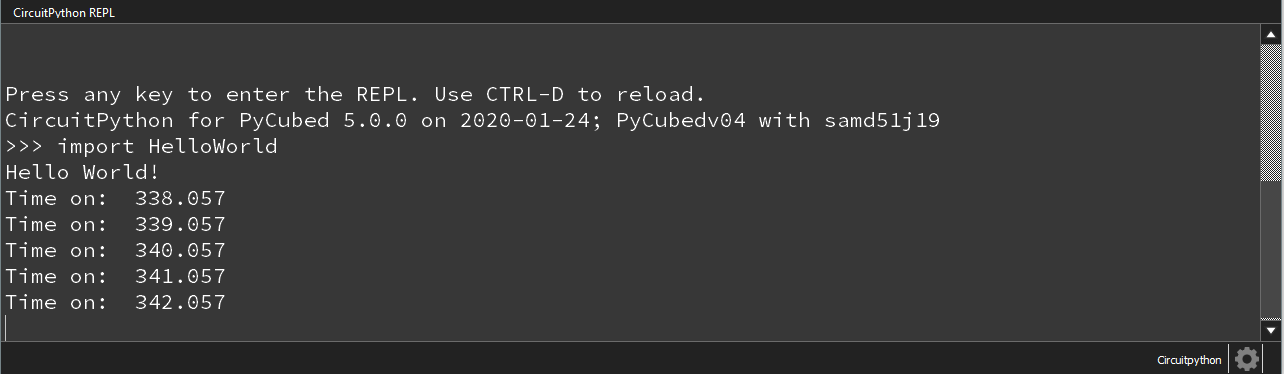
- Run our file by typing
import HelloWorld(capitalization matters!) in the REPL and pressingENTERThe code will now run, and you should see something like what is shown below. Remember that your "Time on:" value could be very different depending on how long the board has been plugged into your computer.
Using the REPL
There are a couple important keyboard shortcuts you can use inside the REPL. You need to click inside the REPL window before trying them:
Ctrl + Cwill HALT the current program (and tell you where it was inside the code). By pressing any key, you will now be able to enter lines one by one or quickly run a program.
Ctrl + Dwill RESET the board (as if you had unplugged it and plugged it back in). It is necessary to reset PyCubed in order for the board to recognize edits you've made to an existing file.
Ctrl + Eenters the "Copy and Paste" mode which will allow you to past chunks of code while maintaining formatting like indents, etc.
Editing a Program
Once you have PyCubed printing strings to the REPL once per second, you're ready to play with how editing and saving program changes works in CircuitPython.
- With your HelloWorld code still running and printing to the REPL, return to your code and change
time.sleep(1)to a different value such astime.sleep(0.1).
- Save the edited HelloWorld file by pressing
Ctrl + Sor clicking the save button along the top menu bar in Mu.
- Notice how the text below is displayed in the bottom-left corner of Mu, but your program is still running at the original 1 second rate.

Saving an existing file to the PYCUBED drive will not trigger the board to reset.
- Manually induce a soft reboot by clicking inside the REPL and pressing
Ctrl + Cto halt the program,Ctrl + Dto soft reboot, andCtrl + Cagain (multiple times if necessary) to halt the default main.py that automatically starts.
- Feeding
import HelloWorldto the REPL will start the program with our recent edits and quickly start printing values:
Notice how the values are now 0.1 seconds apart. Cool!
Example 2: Blink
Building on what we learned in Example 1, let's control some hardware on the PyCubed board. We will start by blinking the RGB LED (aka "Neopixel") on PyCubed using only the built-in libraries.
- With your board connected and Mu open, create a new file by selecting the "New" button along the top of Mu and paste the following code:
import time
import board
import neopixel

# Initialize an instance of the neopixel class called "RGB"
RGB = neopixel.NeoPixel(board.NEOPIXEL, 1, brightness=0.5, auto_write=True)

# ------- MAIN LOOP -------
delay = 2 # make bigger to slow down
i = 0 # a counter to increment each loop
while True:
  print(i)
  RGB[0] = (0,255,0) # pure green in Red,Green,Blue format
  time.sleep(delay)
  RGB[0] = (0,0,0) # turn the NeoPixel off
  time.sleep(delay)
  i += 1
- Click the "Save" button in Mu, navigate to the PYCUBED drive (if it isn't already), and name the file something like
blink.py. After saving the file, my Mu looks like this: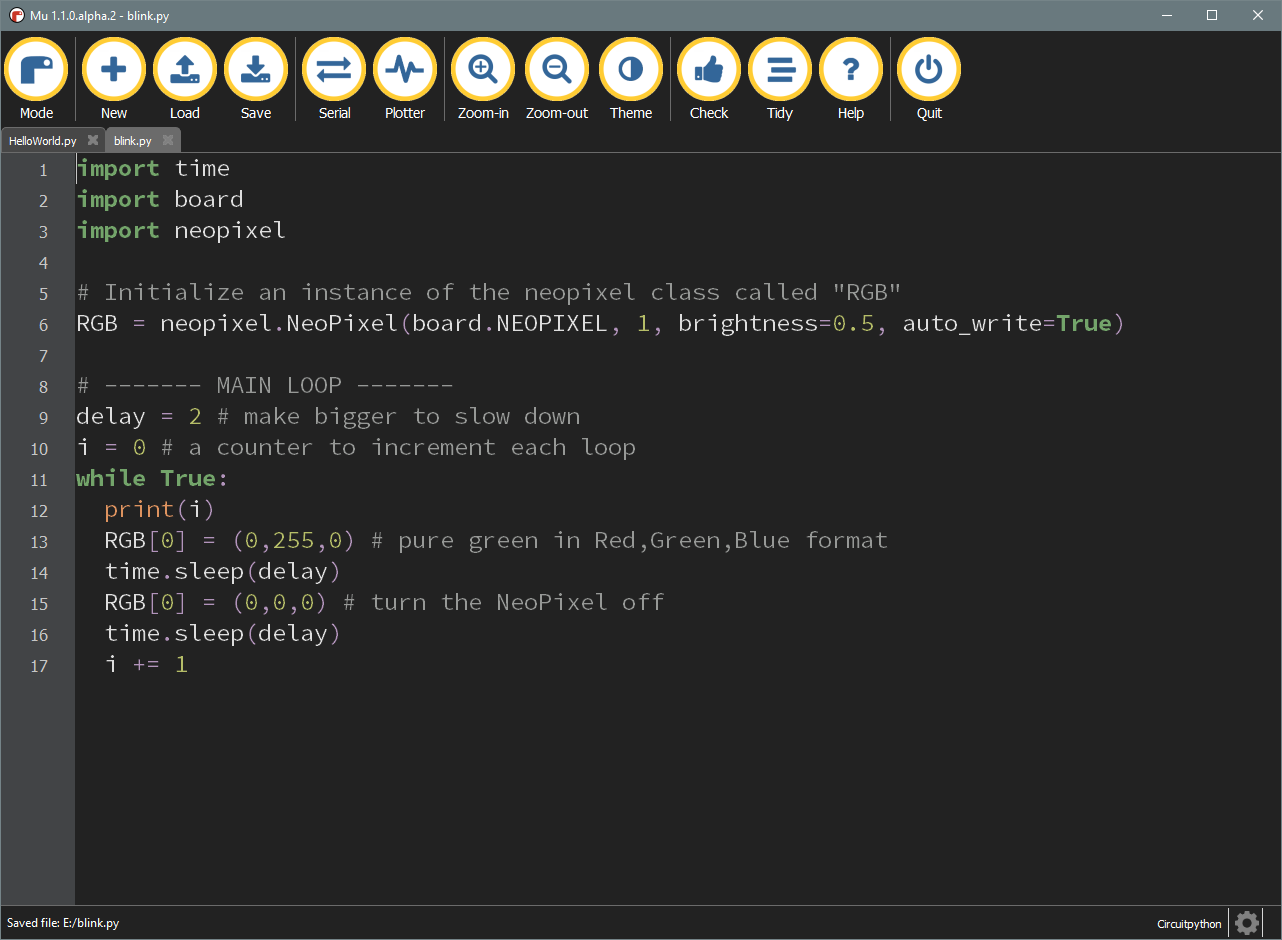
- Open the REPL, press
Ctrl + Cto halt the board, thenCtrl + Dto soft reboot (just for good measure) andCtrl + Conce more to halt main.py.
- Enter
import blinkinto the REPL and you should see something like this:
Awesome! You've now controlled PyCubed hardware purely by editing and saving a text file.
When writing CircuitPython programs, you can imagine how helpful it is to create "checkpoints" or "snapshots" of the code simply by saving the file with a different name. Think: blink1.py , blink2.py , etc..
Example 3:
Now that you've experienced saving and calling your own program from PyCubed, let's try editing main.py directly from Mu.
- Load the
main.pyfile from the PYCUBED drive by clicking the "Load" button in Mu and navigating to the PYCUBED drive and selecting main.py.PyCubed ships with a default
main.pyfile, if you've happened to change it or delete it, copy the attached file below to your board to follow along with the example.👆 Replacement rainbow main.py file (if needed)
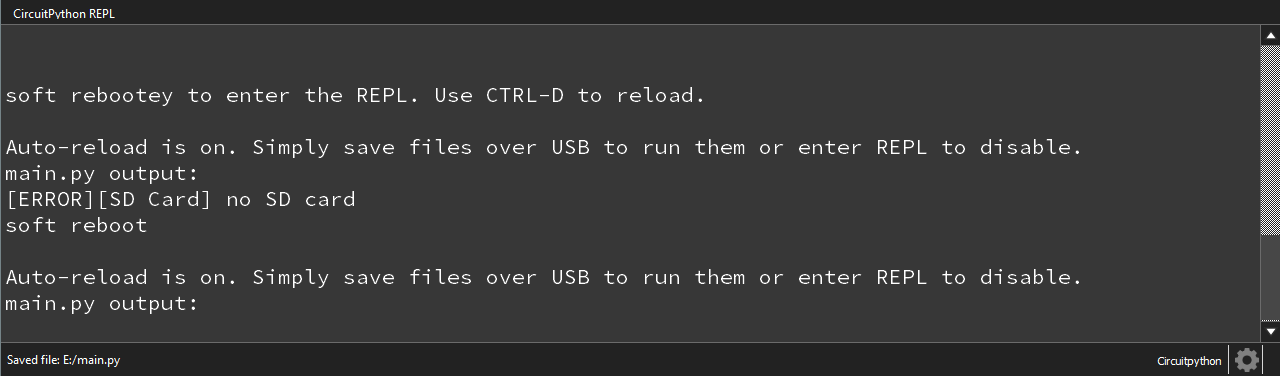
- Open the REPL and soft reboot the board (but don't halt it like in previous examples). The RGB LED on PyCubed should now be cycling through colors.
(note that you'll likely see[ERROR][SD Card] no SD cardin the REPL when main.py starts. This is normal if you don't have an SD card installed. SD cards are discussed in later examples.)
- Now edit the value in line 44 so we can observe a change in the rainbow behavior:

- Save the main.py file from within Mu (
Ctrl + S)
- Notice how as soon as the new file was saved to the board, it rebooted and began running the new code:
this makes troubleshooting/debugging very quick!
 Using the pycubed.py Library