Programming the Bootloader
If you're looking how to update the bootloader or firmware, see
🗳️Updating PyCubed
Flashing a new bootloader
Requirements
- Download and install Atmel Studio 7 (not required, but recommended)
- JTAG programmer with SWD interface (the SEGGER J-Link EDU mini work and cost $18)
- Download the bootloader
.binand firmware.uf2files for your respective board version from the PyCubed GitHub
⭐ bootloader flashing is only required once: on brand-new SAMD51 that haven't been used on a PyCubed board before.
Instructions
- With the requirements above satisfied, plug the JTAG programmer into your computer and open Atmel Studio 7.
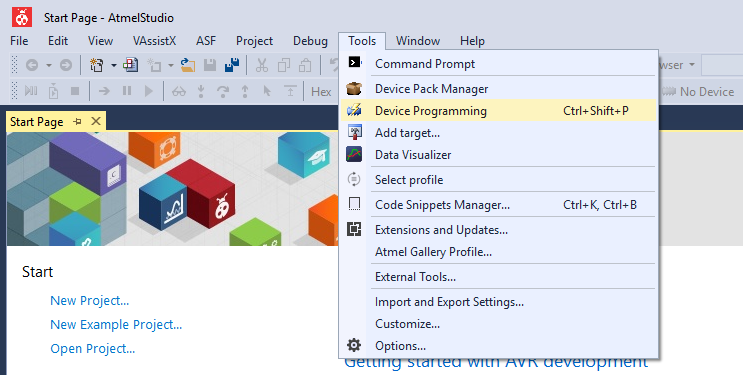
- Navigate to Tools → Device Programming, as shown:
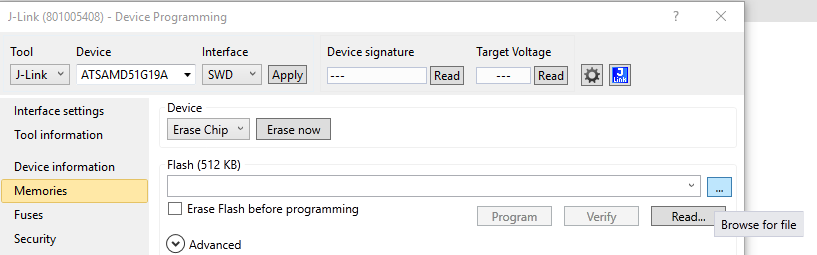
- Select the appropriate Tool and Device from the drop-down menus and click apply.
❗ make sure to choose the correct microcontroller part number. Visually check the part markings on the SAMD51 to confirm if it's the SAMD51x19 or SAMD51x20.

- Navigate to "Memories" on the left-hand side.
- Uncheck the "Erase Flash before programming" box, and then click the "..." button, as shown:
- Navigate to the directory you saved the GitHub firmware files, and change the file parameters from "Programming Files" to "Binary" and shown:

- Select the
.binfile downloaded previously and click the "Open" button: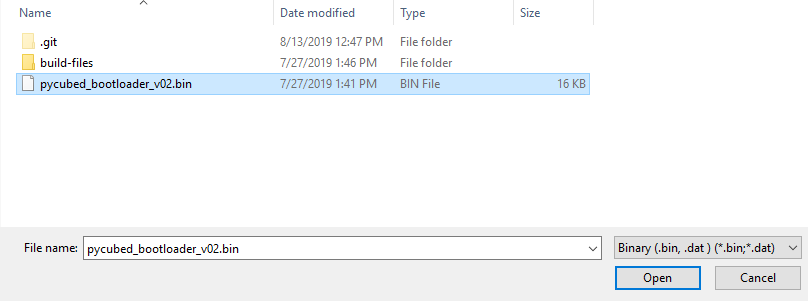
- Now make the following connections to the PyCubed board. If you're careful, you can avoid soldering header-pins to the board by just holding jumper-wire pins (or pogo pins, if you have them) against the through-holes during programming. When in doubt, solder the header pins.
Required Connections:
- Main micro USB cable (to provide power)
NOTE: it's good practice to use a multimeter and confirm 3.3V is present when the USB connection is made to the PyCubed board. If the voltage doesn't read 3.3V between "3V3" and "GND" you need to troubleshoot that first.
- VTref (connected to 3V3)
- TMS (connected to SWDIO)
- TCK (connected to SWCLK)
- GND (connected to GND)

- Main micro USB cable (to provide power)
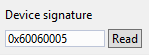
- With the connections made, return to Atmel Studio 7 and click the "Read" button. A device signature should populate. If an error appears, check connections and troubleshoot the specific error message.
Common Errors
"Error connecting to device over SWD" - this is usually a bad connection between the JLINK and the PyCubed board
"Read voltage ____V is outside the selected device's operating range" - means a bad VTref or GND connection, or the PyCubed board isn't properly regulating 3.3V.
- After receiving a device signature, click the "Program" button. Programming should only take a few moments.
- Successful bootloader programming will trigger the PyCubed board to reboot. After a few moments, the board should mount to the computer as a
PYCUBEDBOOTdrive.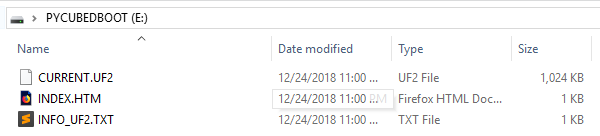
Flashing the Firmware:
- Drag the CircuitPython firmware
.uf2file downloaded previously to thePYCUBEDBOOTdrive: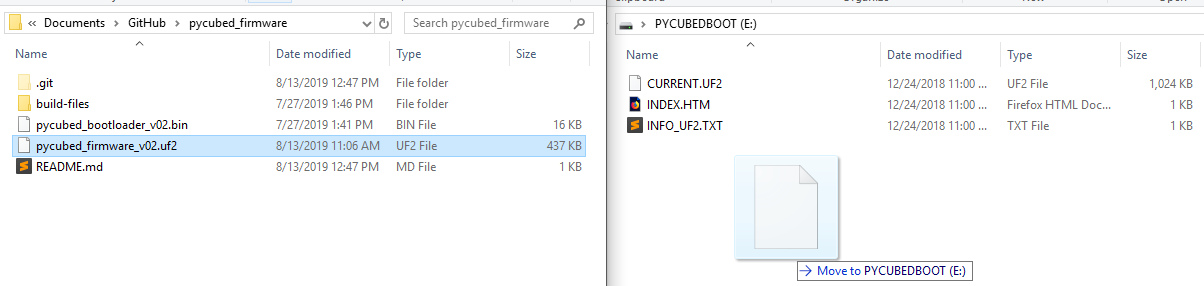
- As soon as the file is done transferring, the board will reboot again and mount as
CIRCUITPYorPYCUBEDand is now a functioning CircuitPython board. Congratulations! 🎉Note: you may wish to load the default libraries by copying everything from the respective board version here: https://github.com/pycubed/software to your
PYCUBEDdrive.
Entering bootloader-mode and checking the version:
- Connect the PyCubed board to your computer via USB
- Quickly double-click the "RESET" button located on the top of the board
The pace of the double-click can be difficult. If it doesn't work, keep trying and make sure you hear/feel the click of the button.
The RGB LED should be a steady green color in bootloader-mode.
- A successful double-click puts the board into bootloader-mode and it will mount to your computer as a drive labeled
PYCUBEDBOOTPyCubed board in bootloader mode and mounted to a Windows 10 machine
To check the version:
Locate and open the file INFO_UF2.TXT on the drive it should read something like this:
UF2 Bootloader v3.13.0-dirty SFHWRO
Model: PyCubed
Board-ID: PYCUBED_J19
Updating the bootloader