
Unpacking & Hardware Overview
What's in the Box 📦
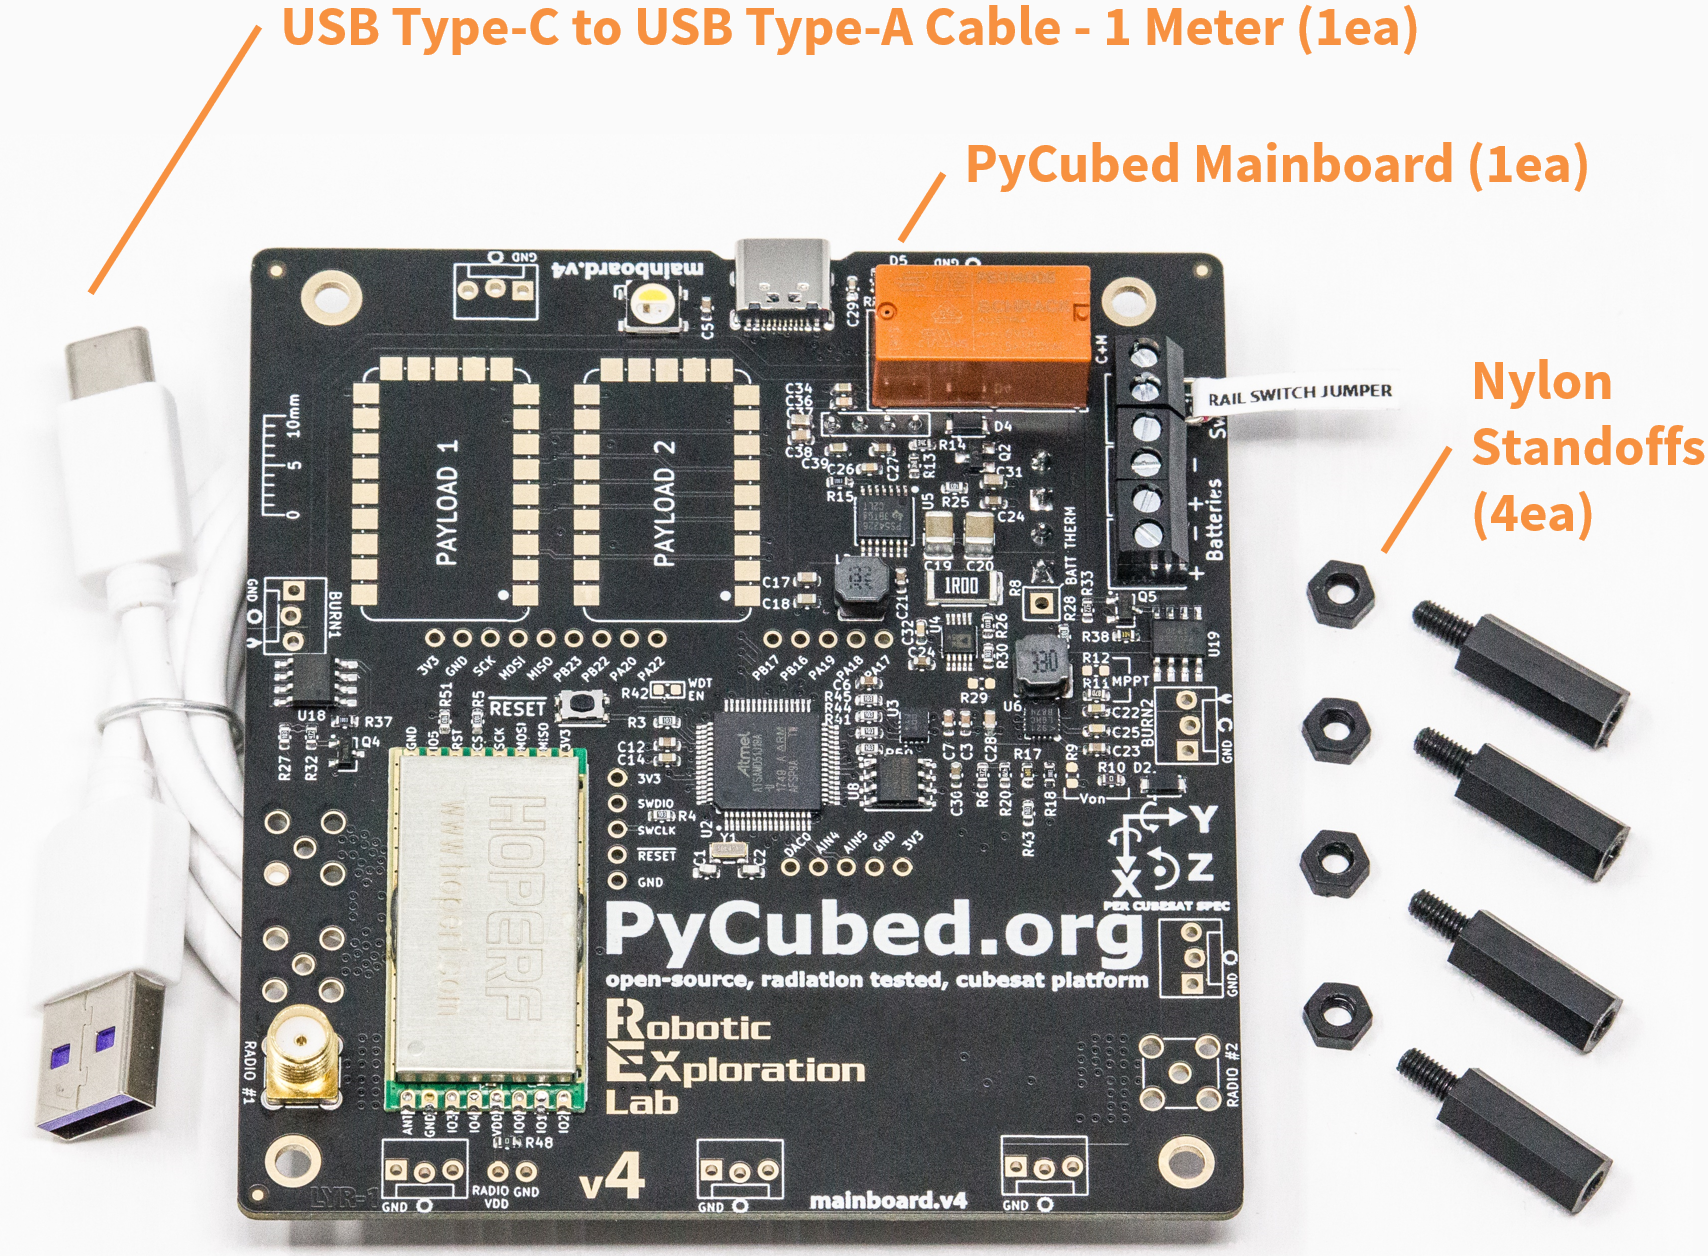
- 1ea PyCubed Mainboard (latest version)
- 1ea USB Type-C to USB Type-A cable
- 4ea Nylon standoffs
- 2ea RBF jumpers
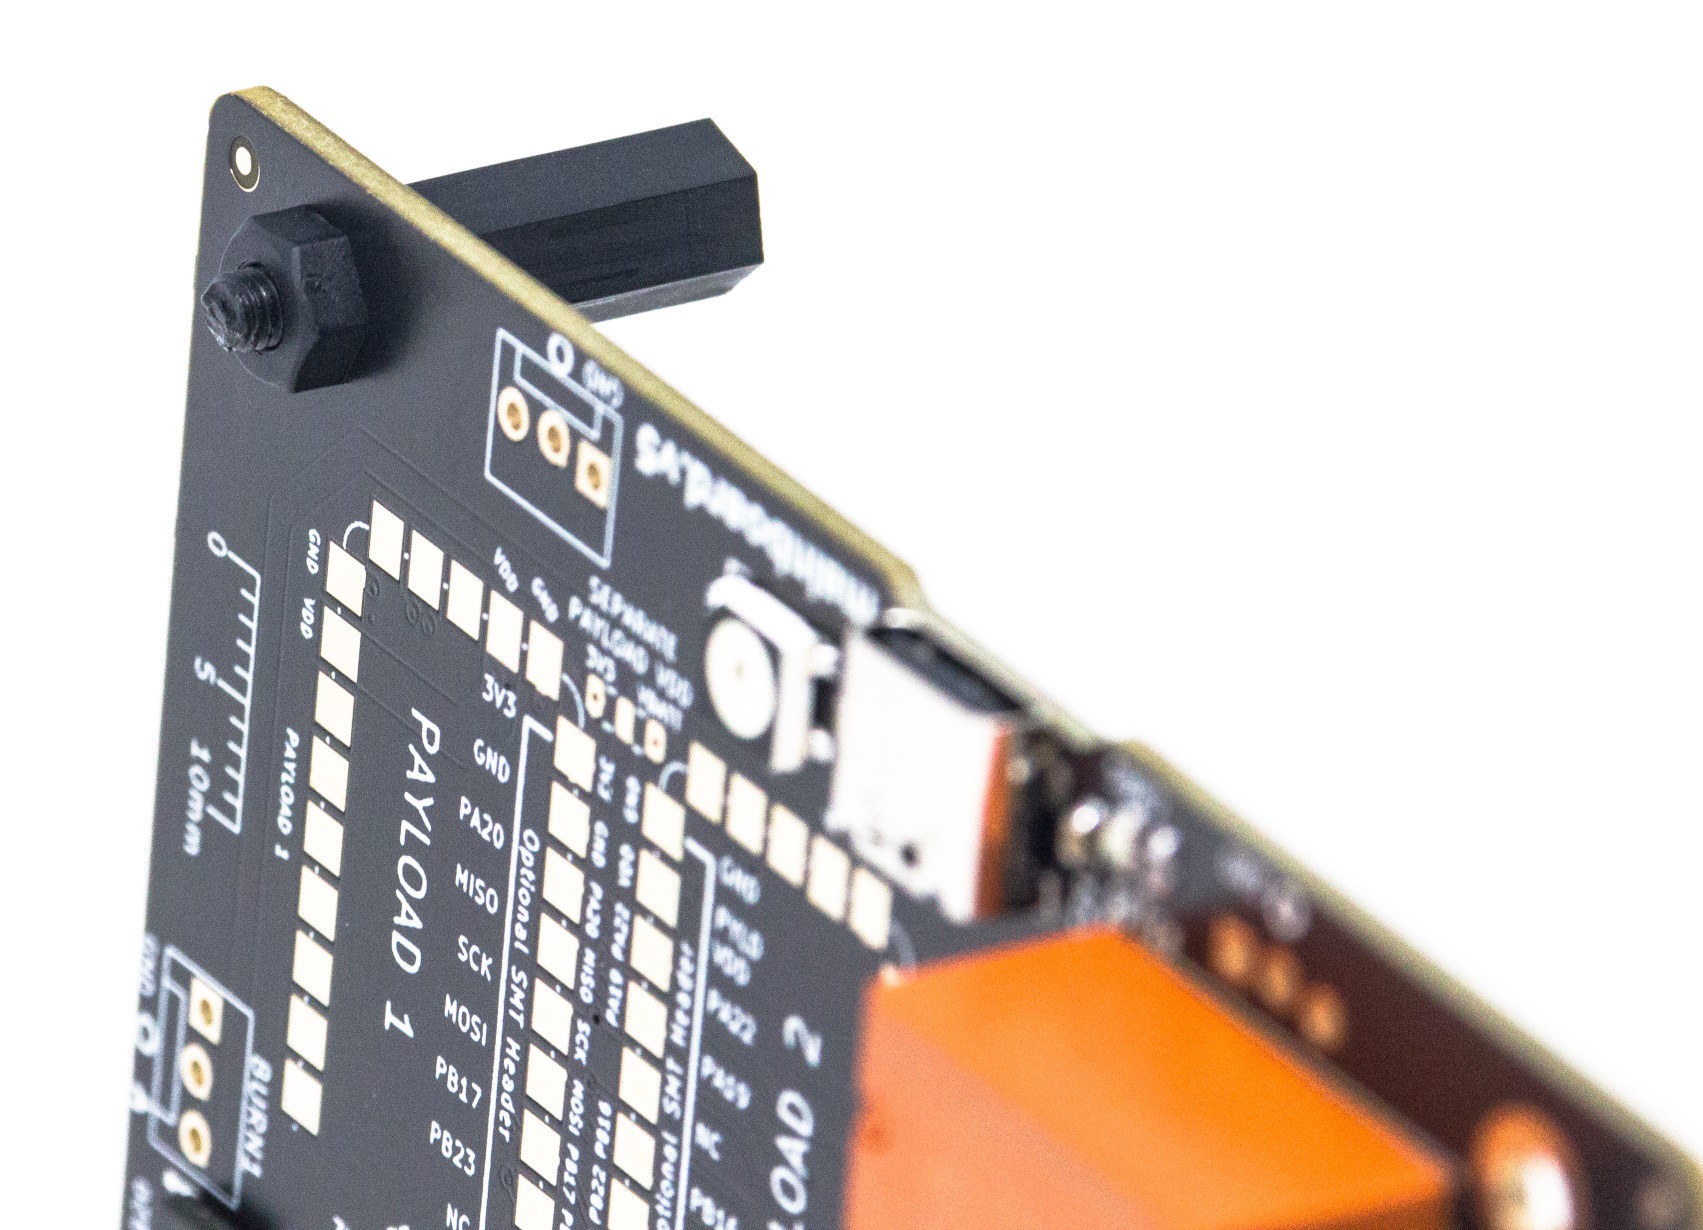
Install Standoffs
Standoffs are important when working with PyCubed outside of a CubeSat structure (like on your desk).
- Install the four provided black nylon standoffs.
Board Overview
Primary Circuit Elements
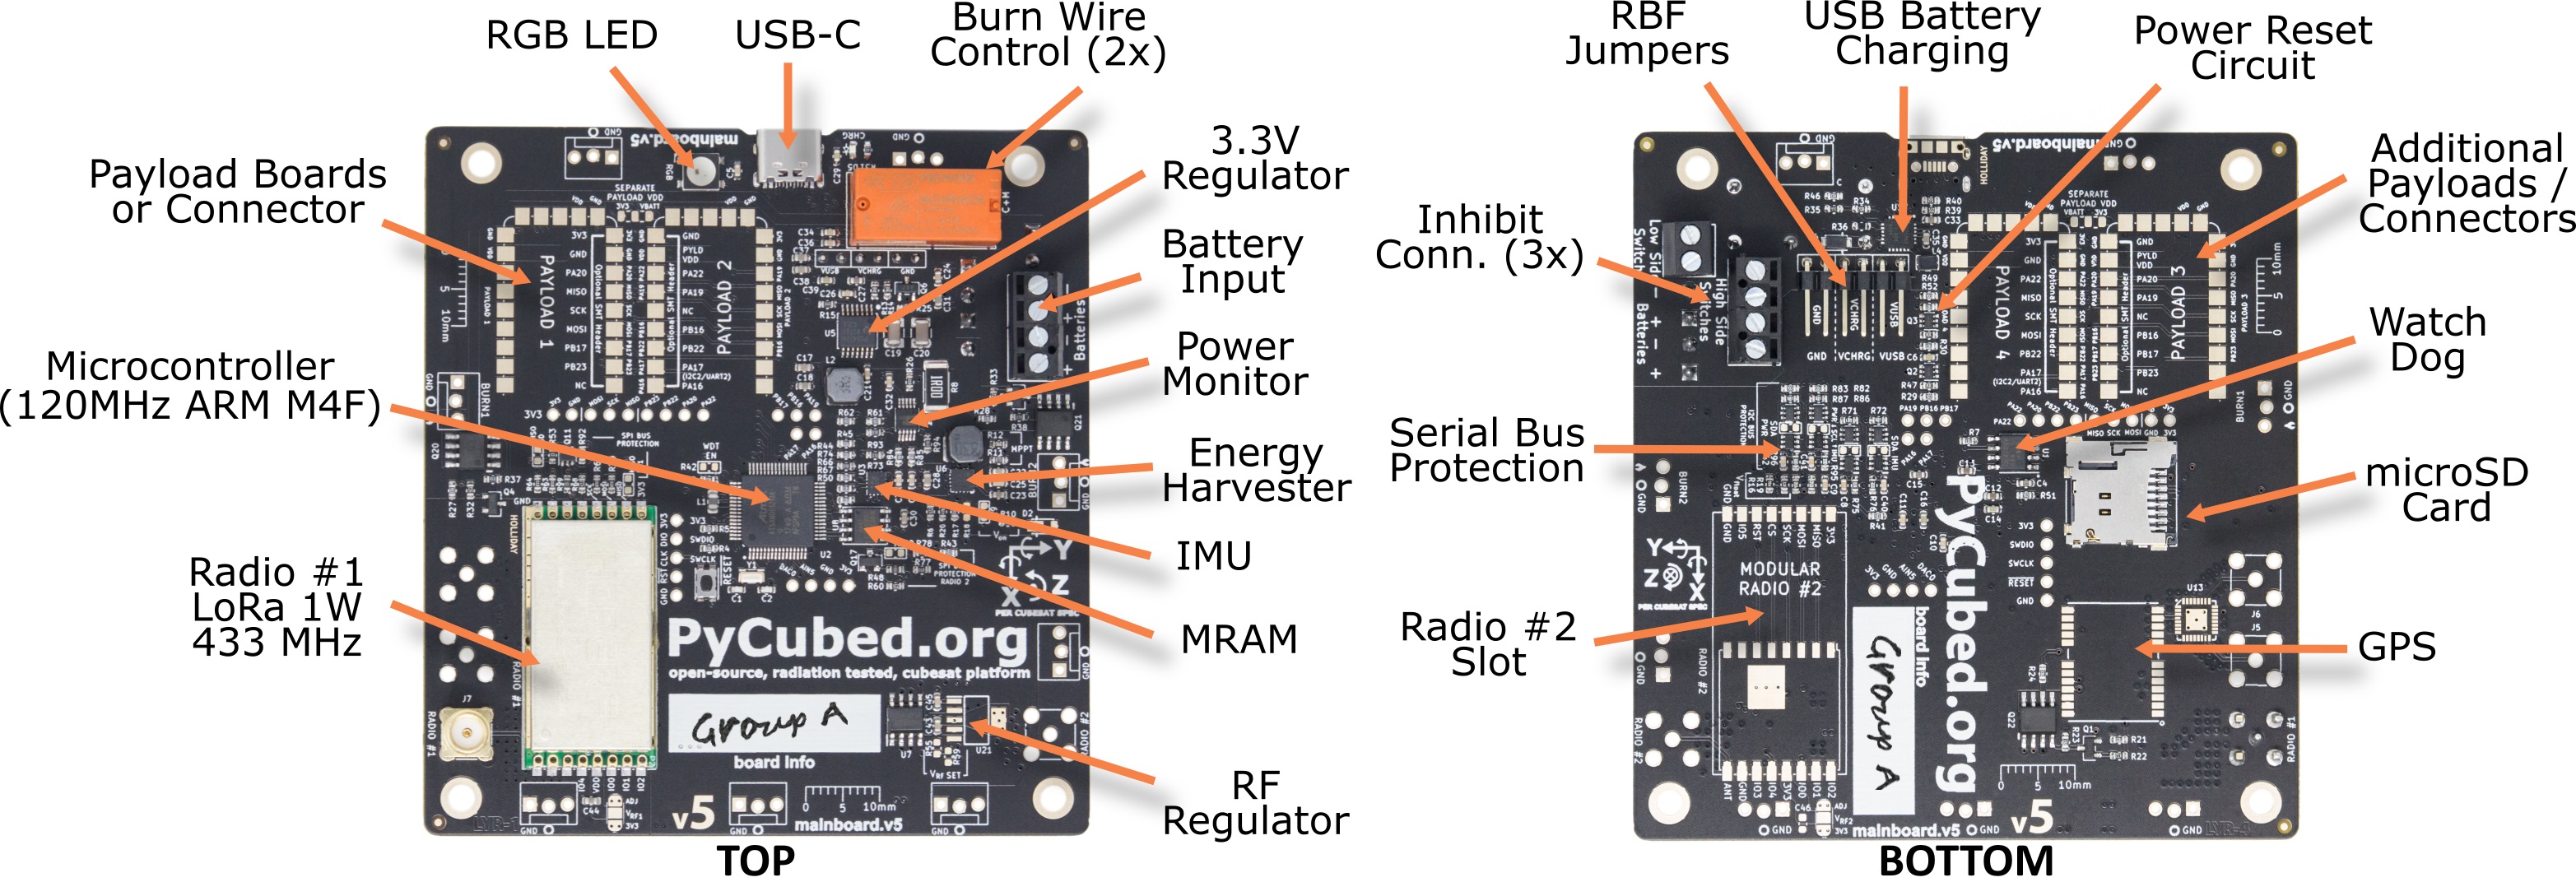
Effective use of PyCubed requires at least a broad understanding of the board components and their capabilities. Core circuit elements that comprise PyCubed are identified above.
Connectors
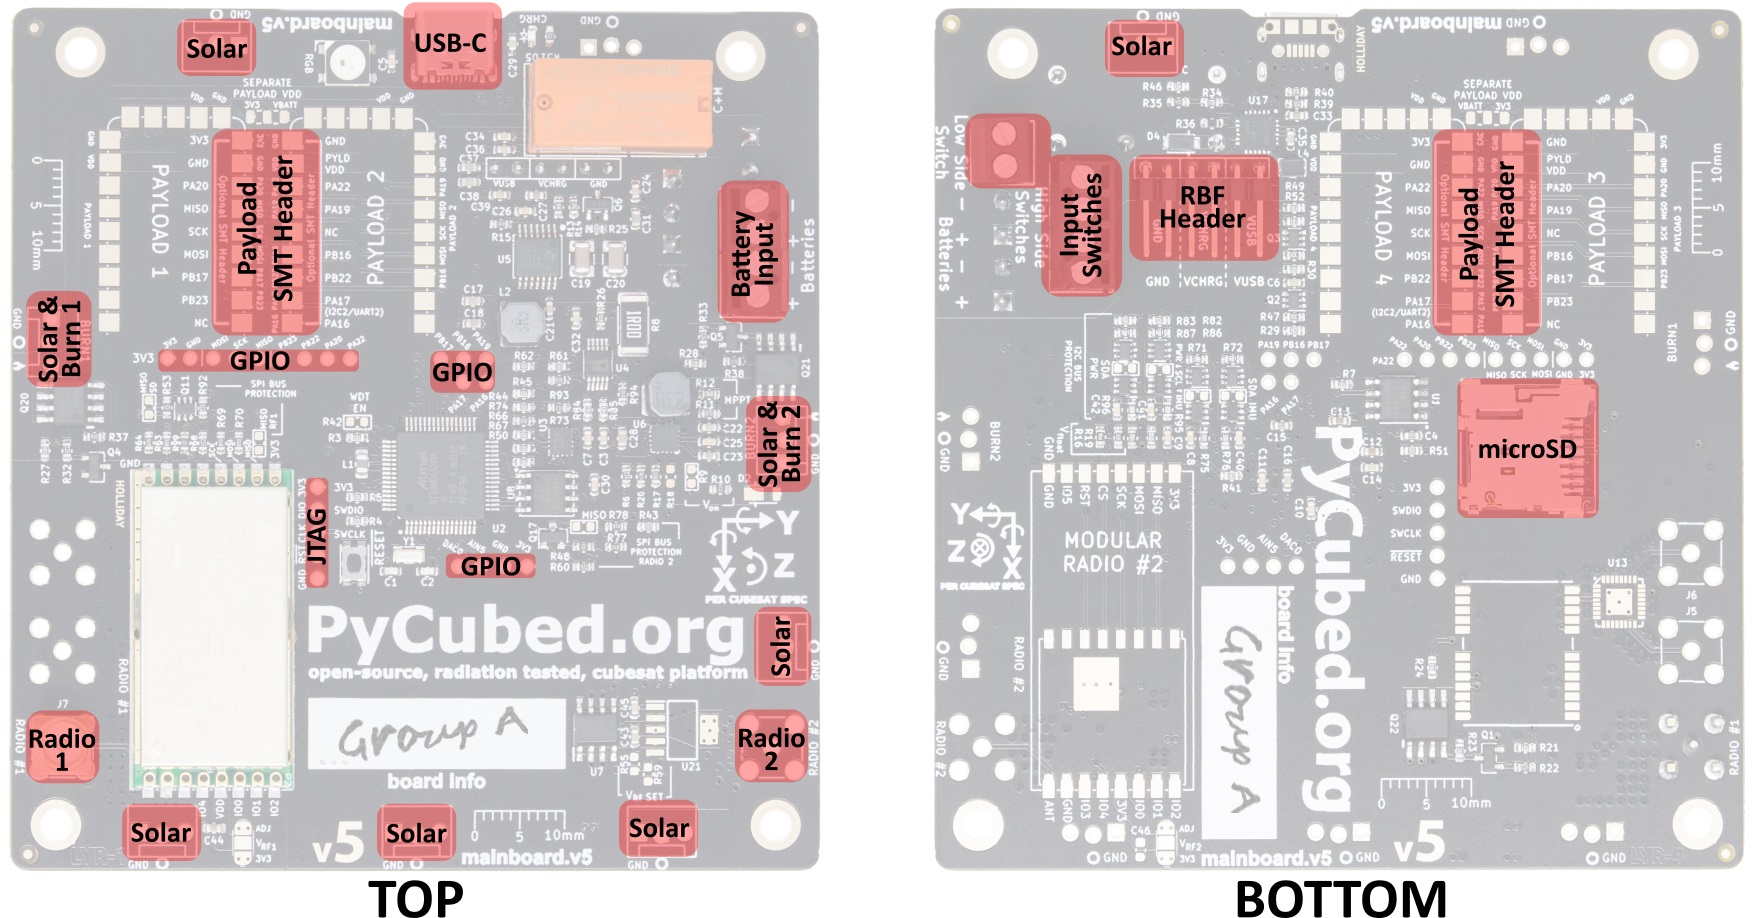
Check Inhibits
PyCubed includes mechanical inhibits as required by many CubeSat integration and launch providers. On as-received PyCubed boards these inhibits are BYPASSED using the "RBF jumpers" to allow easy benchtop prototyping and learning.
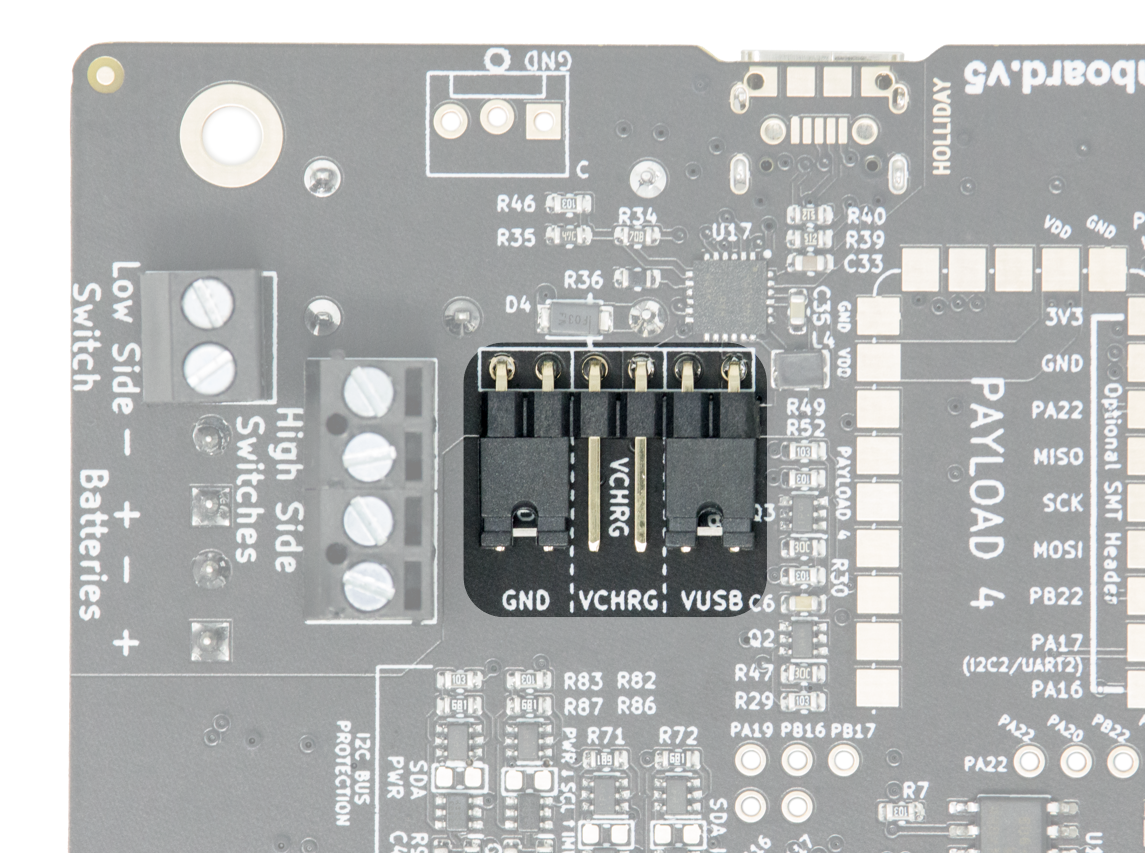
Verify your RBF jumpers are configured as shown above to ensure proper operation in the following tutorials.
- "GND" jumper = installed ✅
This jumper allows the USB power IC to power the board. Ensure the jumper is still in place as shown below.
- "VCHRG" jumper = NOT installed ❌
The "VCHRG" jumper allows the USB port to charge 2S Li-Ion battery packs (nominal 7.4V) connected to the battery input terminals. Only install this jumper when a 2S battery is connected.
- "VUSB" jumper = installed ✅
This jumper allows the USB power IC to power the board. Ensure the jumper is still in place as shown below.
 Download Mu